Is there a disconnect between your website’s lead form and Salesforce.com? Want to capture all the information leads enter on your website in Salesforce?
The Web-To-Lead form is the most efficient way to do so. With Salesforce’s web-to-lead form generator, the user can choose which fields they would like to capture (Name, Address, Email, Phone Number, etc) and automatically create the HTML needed to embed those same fields into a form on any website. This process (illustrated below) syncs your online web presence with Salesforce data and eliminates manual upload.
To begin, click on your name in the upper right hand corner of the screen, then click “Setup.”
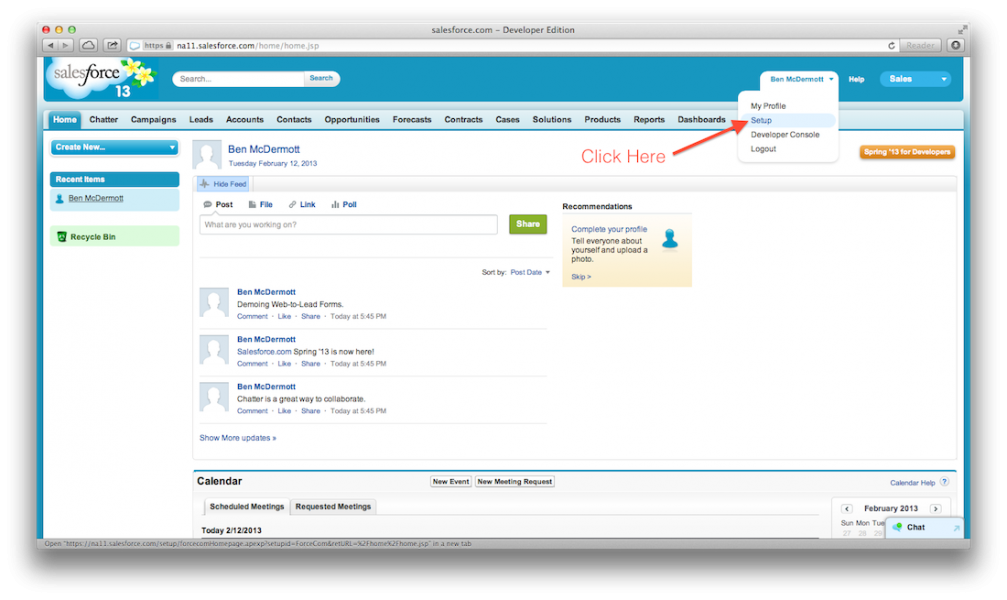
Access the Salesforce Setup page.
Once on the Setup page, type “web” into the Quick Find Search and click “Web-to-Lead.”
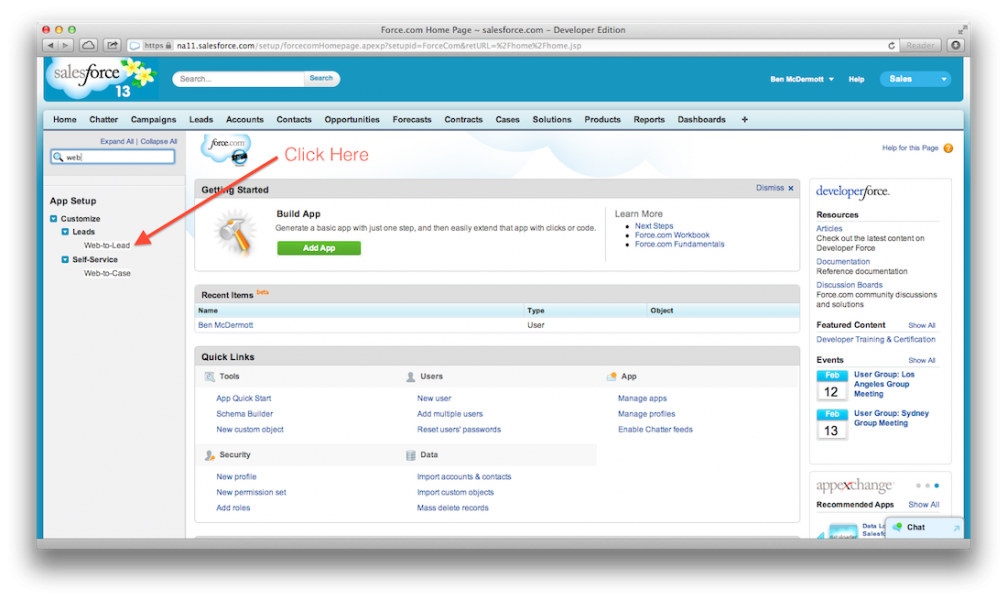
Access the Web-to-Lead page in Salesforce.
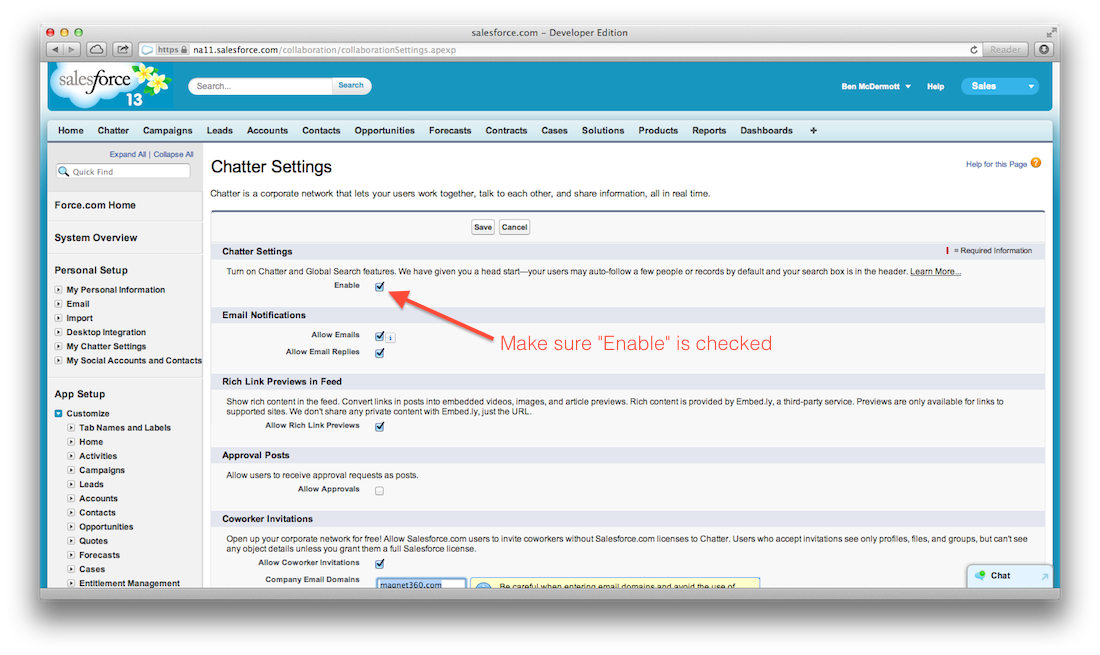
Now simply click the “Create Web-to-Lead Form” Button. (Note: If Web-to-Lead is not yet enabled, click the “Edit” button and check the “Web-to-Lead Enabled” checkbox)
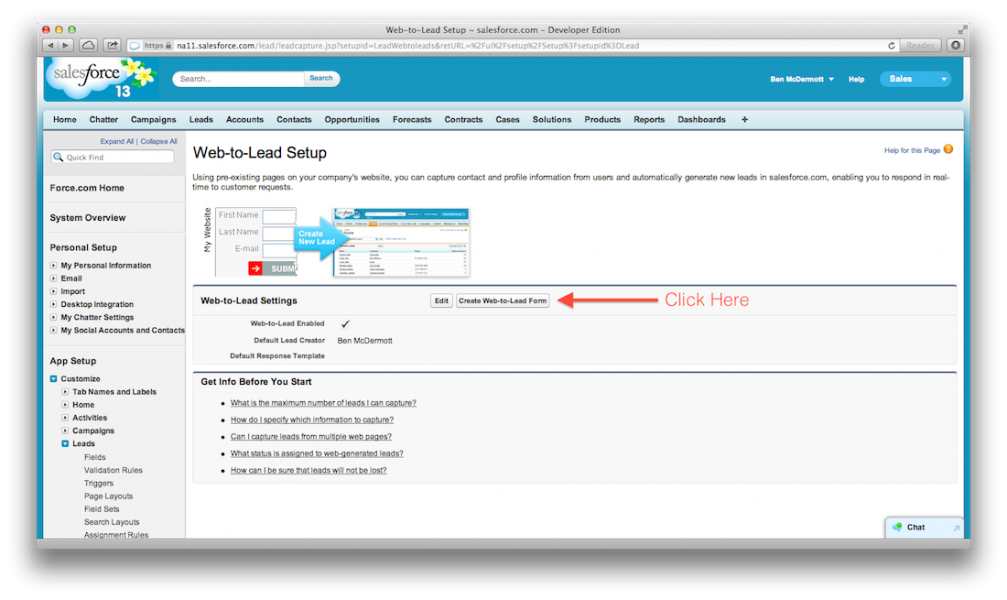
Click the “Create Web-to-Lead Form” Button
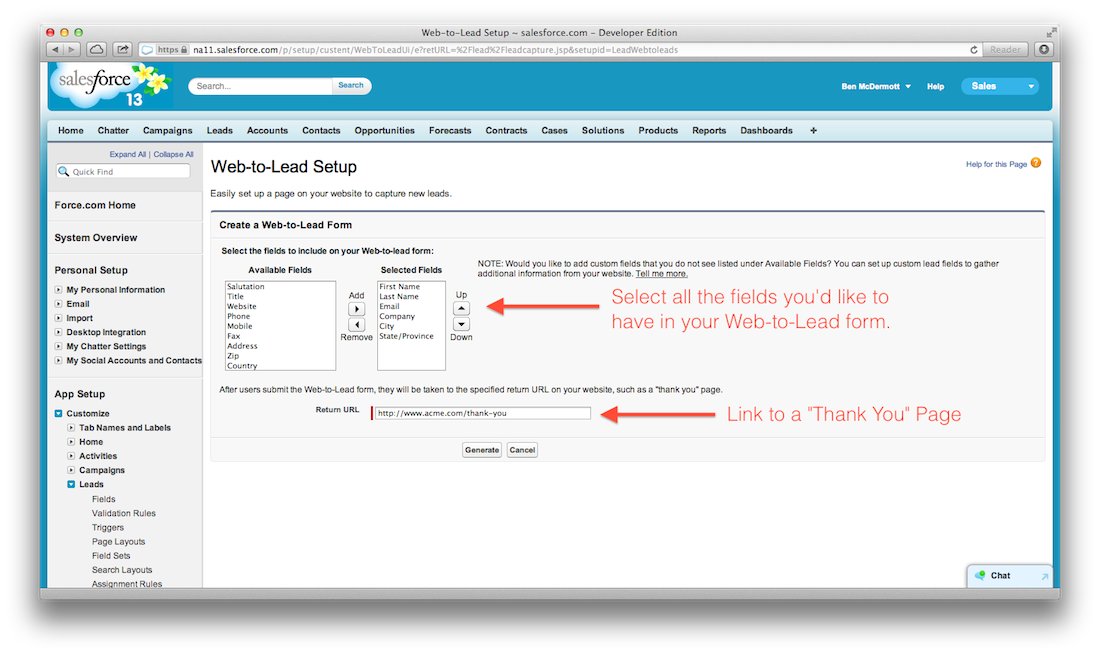
Now you get to select what information you’d like to capture from your Leads. This is usually standard information like Name, Email, Phone number, and Address, but Salesforce allows you to use custom fields that have been created as well. This could range from what type of Dog a customer has to the number of people in their family. The sky is really the limit on this – but be sure not to include too many fields as customers are more likely to fill out a simple form than an overbearing no holds barred page-long interview.
You’ll also note a Return URL field – this tells Salesforce where to send the customer after they hit “submit” on your form. I would recommend creating a custom Thank You page so that users know their form submission was successful and also to show them that you do in fact care that they gave you information!

Create your Web-to-Lead Form.
Now click the “Generate” button and Salesforce will automatically create the HTML for your form. Salesforce provides instructions embedded within the code that explain how to insert this into your website. Feel free to stop here and hand the snippet of code over to your Developer or continue on and learn how to do it yourself!
There are two main steps to embedded the HTML form into your web page. The first is to add a small piece of code in between the <head> and </head> tags on the page.
<META HTTP-EQUIV=”Content-type” CONTENT=”text/html; charset=UTF-8″>
Next, you’ll insert the entire form wherever you’d like on the page:
<form action=”https://www.salesforce.com/servlet/servlet.WebToLead?encoding=UTF-8″ method=”POST”>
<input type=hidden name=”oid” value=”00DG0000000Brnp”>
<input type=hidden name=”retURL” value=”http://www.acme.com/thank-you”>
<label for=”first_name”>First Name</label><input id=”first_name” maxlength=”40″ name=”first_name” size=”20″ type=”text” /><br>
<label for=”last_name”>Last Name</label><input id=”last_name” maxlength=”80″ name=”last_name” size=”20″ type=”text” /><br>
<label for=”email”>Email</label><input id=”email” maxlength=”80″ name=”email” size=”20″ type=”text” /><br>
<label for=”company”>Company</label><input id=”company” maxlength=”40″ name=”company” size=”20″ type=”text” /><br>
<label for=”city”>City</label><input id=”city” maxlength=”40″ name=”city” size=”20″ type=”text” /><br>
<label for=”state”>State/Province</label><input id=”state” maxlength=”20″ name=”state” size=”20″ type=”text” /><br>
<input type=”submit” name=”submit”>
</form>
If you’d like to test in debug mode, add the following just after the form action (<form action=”https://www.salesforce.com/servlet/servlet.WebToLead?encoding=UTF-8″ method=”POST”>):
<input type=”hidden” name=”debug” value=1>
<input type=”hidden” name=”debugEmail” value=”INSERT YOUR EMAIL ADDRESS HERE”>
And that should do it! Now your form is available to any website visitors that come to your page and the fields are mapped directly to Salesforce. I’d recommend testing this by entering a few fake leads into the form and looking to see whether or not they’re created in Salesforce. Otherwise, you’re done, and the only thing to consider is that Salesforce only allows 500 Web-to-Leads created per day. For most companies, this would be a GREAT day! However, if you’re part of a larger organization and expect a lot of traffic, be aware of this limit.
Please add suggestions in the comments for improvements or other topics you’d like to see so I can make this the best resource possible!