Chatter is the Twitter of Salesforce. It allows users to post short updates regarding certain records, groups, or general news. This short guide will walk you through the steps of creating a Public Chatter Group that enables users to share information with a certain set of people.
First, make sure Chatter is enabled. To do this, click your name and “Setup.”

Access the Salesforce Setup page.
Then click Chatter > Settings.

Click through to Chatter Settings.
And finally, make sure the “Enabled” checkbox is ticked. Once its ticked, you’re all set!
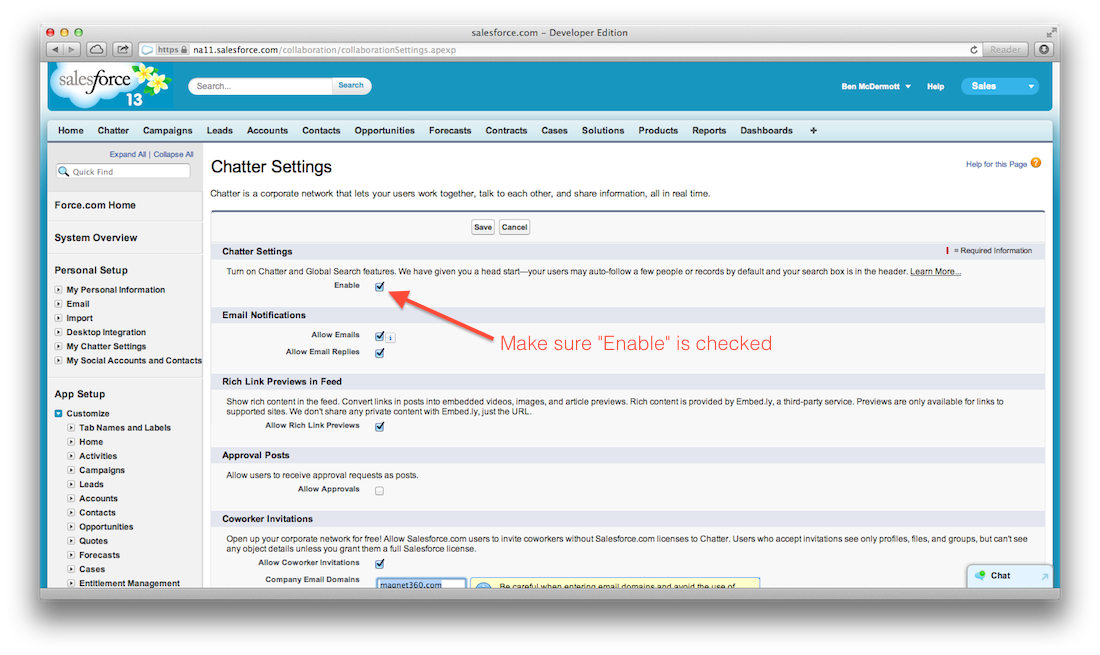
Check the “Enable” checkbox.
Now, to the point of the post, creating a Public Chatter Group. Navigate to your Chatter Homepage.

Click through to the Chatter homepage.
Click the “Groups” link on the left sidebar.
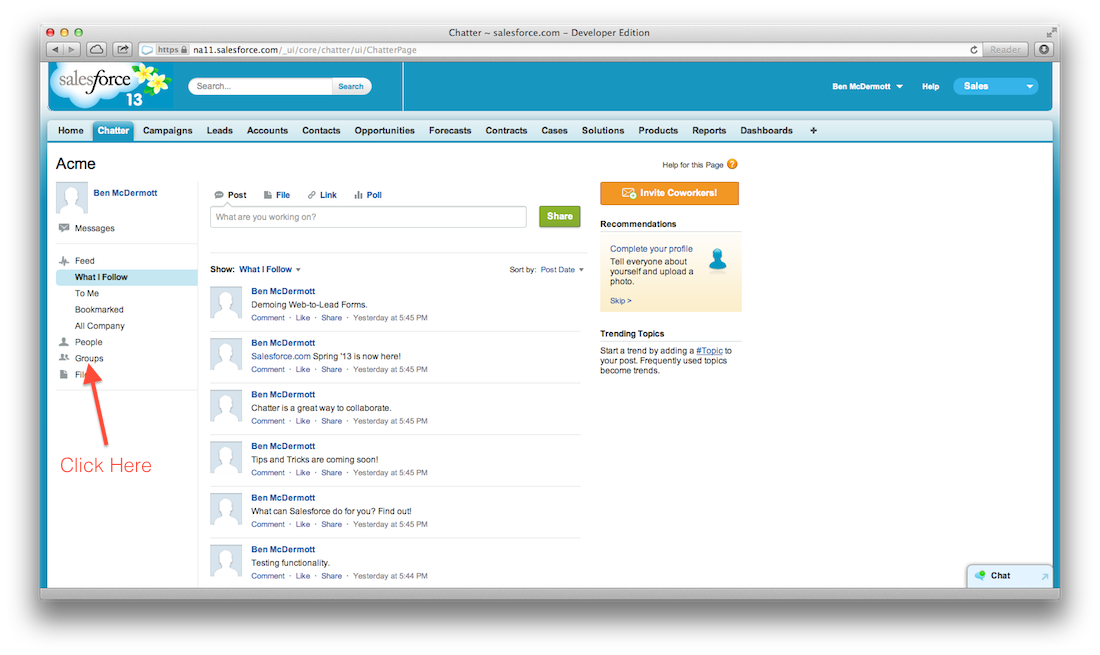
Click through to the “Groups” page.
At the top of the page, click “New Group” to create your Chatter Group.
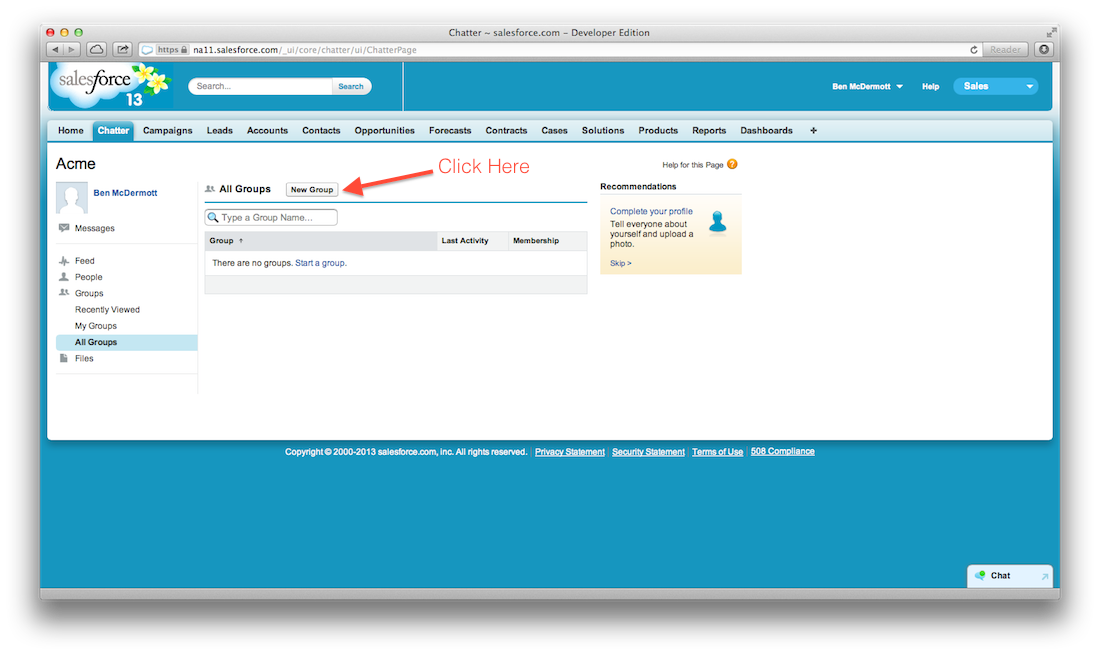
Click “New Group”
Select the public radio button. This allows all Chatter users to see the group, its updates, and join if they like. We’ll go over the creation of a private group in this post.

Select the “Public” button.
After clicking Save, your Chatter Public Group is ready to use. You can now add users, edit the group description, or post updates to the group.
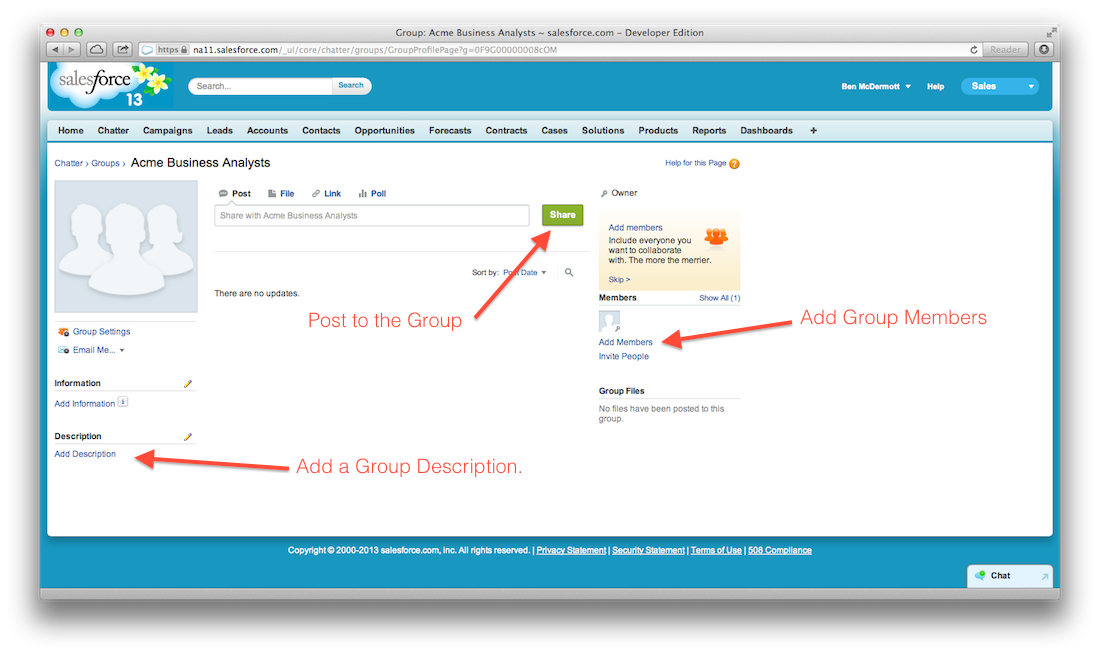
Update your group description, add users, or post to your new group.
Now that your Public Group is ready to use, start posting! Chatter serves its users best when everyone is sharing and collaborating. There are even some nice reports that show interaction with Chatter and allow for interaction-based rewards.
Check out my other post on Private Chatter Groups.
And as always, I’d happily respond to questions/comments/suggestions!